
Dynamics 365 Functional Consultant
Subscribe to the newsletter
Agility and speed are critical in the supply chain industry, especially as customer expectations continue to rise.
The growing pool of customer demands, intense competition, and the need to lower supply chain costs place significant pressure on businesses to deliver products efficiently and swiftly. In such cases, cross-docking can be a game-changer by reducing storage requirements and minimizing handling times during transit.
Let’s learn more about the cross-docking operation, understand how it works and how to leverage this feature in Dynamics 365 Supply Chain Management.
What is cross docking?
Cross-docking is a warehouse process where inventory needed for an order is immediately directed from the point of receipt or creation to the appropriate outbound dock or staging area. Any surplus inventory from the inbound source is routed to its designated storage location using the standard put-away process.
This method aims to minimize handling time, lower inventory storage costs, and accelerate the distribution process.
Benefits of cross-docking: A faster route to fulfillment success
- Minimal storage: Products are usually moved directly from one transportation mode to another without being stored in a warehouse.
- Efficiency: It helps reduce warehousing expenses and decreases the time goods spend in transit or storage.
- Lower inventory: By avoiding prolonged storage, the need for large inventories in warehouses is minimized, reducing costs.
- Speed: The process enables quicker delivery to customers or retail locations.
Getting started with running cross-docking in Dynamics 365 Warehouse Management
If you are using Supply Chain Management version 10.0.28 or earlier, you will need to enable planned cross-docking before utilizing it. To do this, navigate to Feature Management and activate the following features in the specified order:
- Planned Cross-Docking
(In version 10.0.29, this feature becomes mandatory and cannot be disabled.) - Cross-Docking Templates with Location Directives
(In version 10.0.29, this feature is enabled by default. By version 10.0.32, it becomes mandatory and cannot be turned off.)
Setting up cross docking
Planned cross-docking is configured as a load posting method. Once the feature is enabled, it’s necessary to regenerate the methods. Follow these steps to get started:
Step 1: Create the cross-docking template
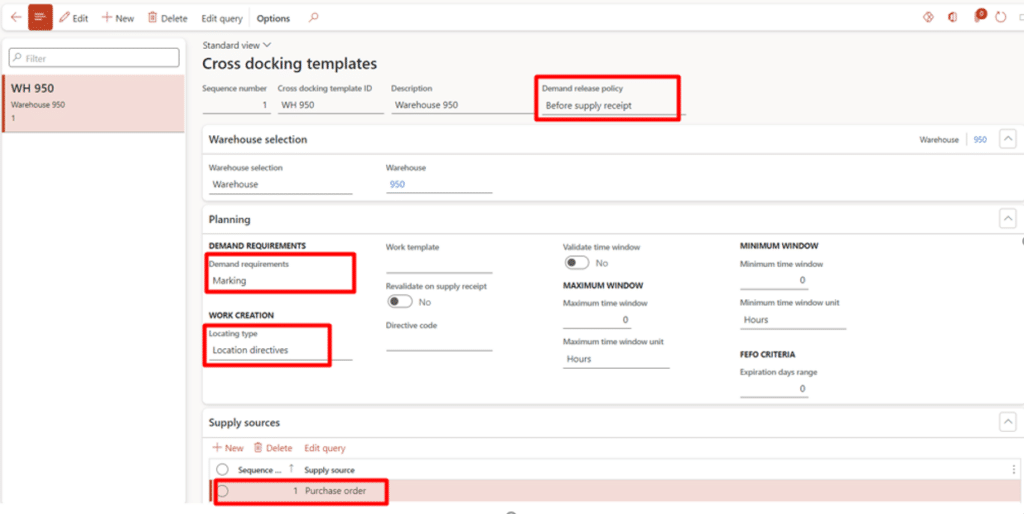
In the Cross-docking template form, the following settings will be configured:
- Demand release policy: Choose “Before supply receipt.”
- Warehouse: Set to 950 (ensure the Warehouse management feature is enabled).
- Demand requirement: Set as Marking.
- Locating type: Select “Location directives.”
- Work template: Create a work template for Cross-docking and link it to the template.
- Supply Source: Click “New” and create a “Purchase order.”
Navigation: Warehouse management > Setup > Work > Cross-docking templates.
Step 2: Create a work class
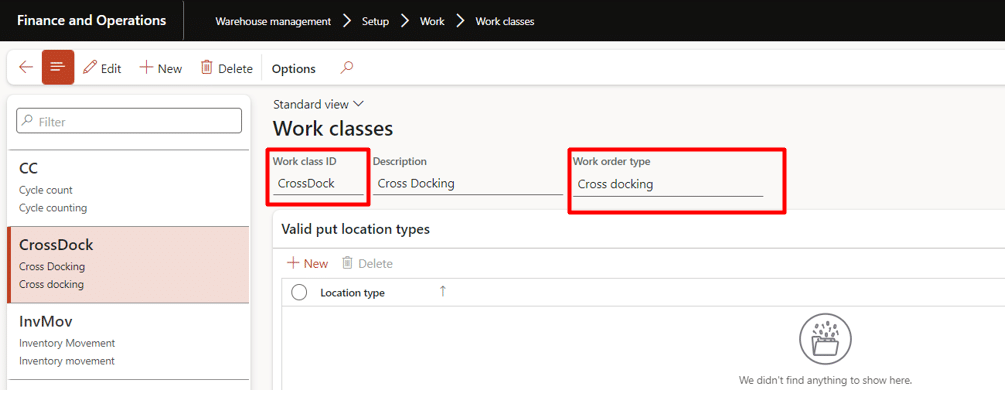
Create a Work class for cross-docking.
Navigation: Warehouse management > Setup > Work > Work classes.
- Set Work class ID as CrossDock
- Add Description: Cross Docking
- Work order type should be Cross-docking
Step 3: Create work templates
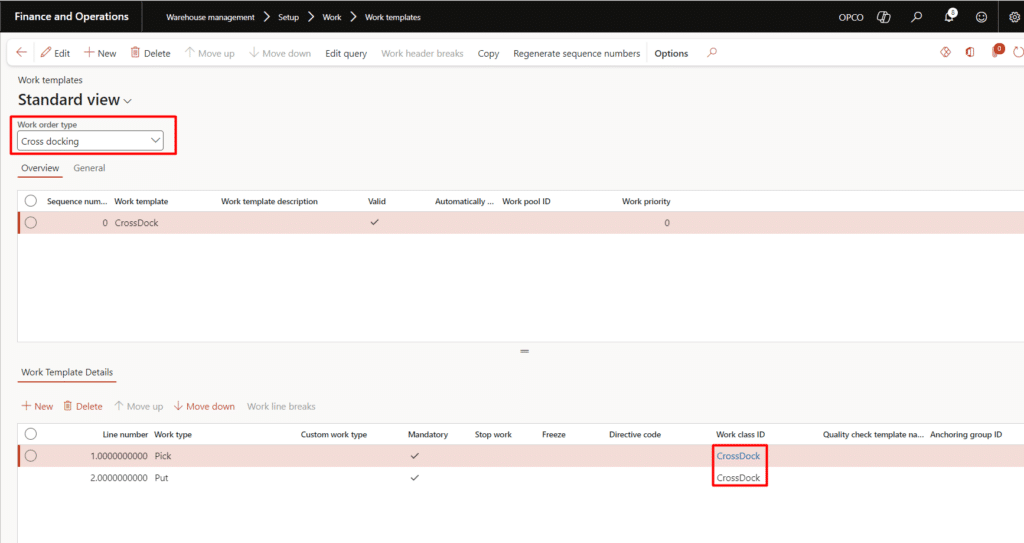
Create a “Work template” for the work order type “Cross-docking.” This work template will be utilized to generate pick and put work tasks for the warehouse worker.
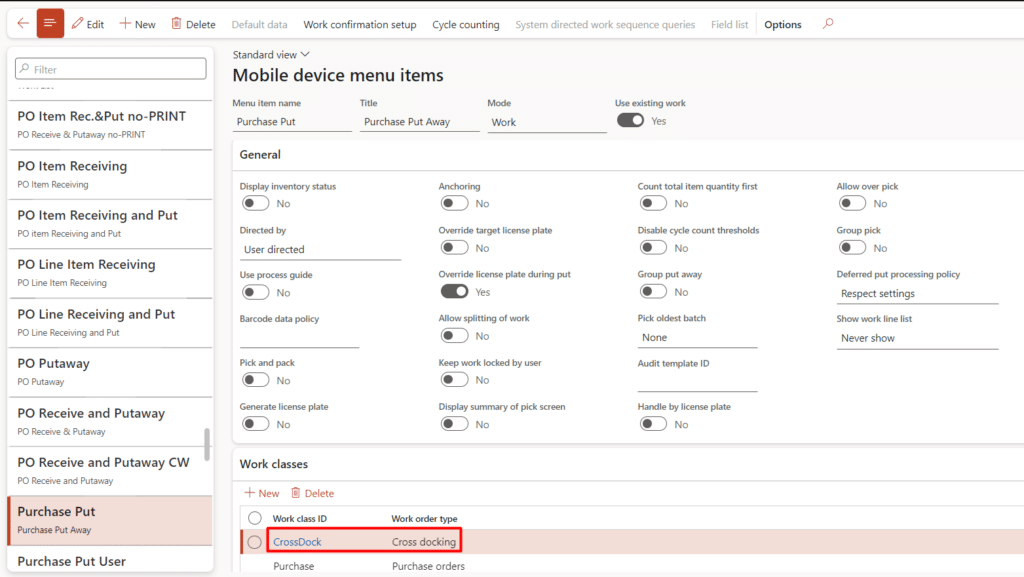
Associate the Work class ID “CrossDock” in both lines to link the work template with the mobile device menu item.
Step 4: Create location directive
Location directives are used to guide the warehouse worker in picking items from the Inbound location and placing them at the “Packing” station.
To set this up, navigate to: Warehouse management > Setup > Location directives.
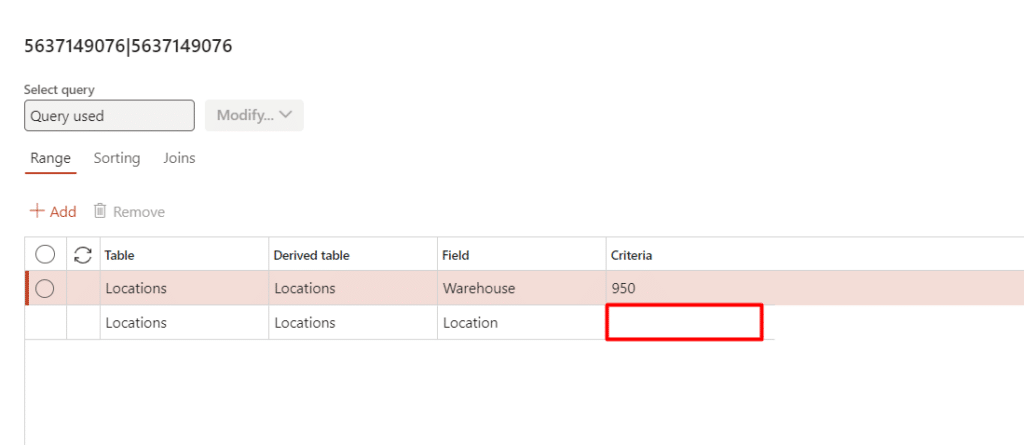
We have configured a “Put” directive within the location directive, which directs the warehouse worker to place items at the “Baydoor” location.
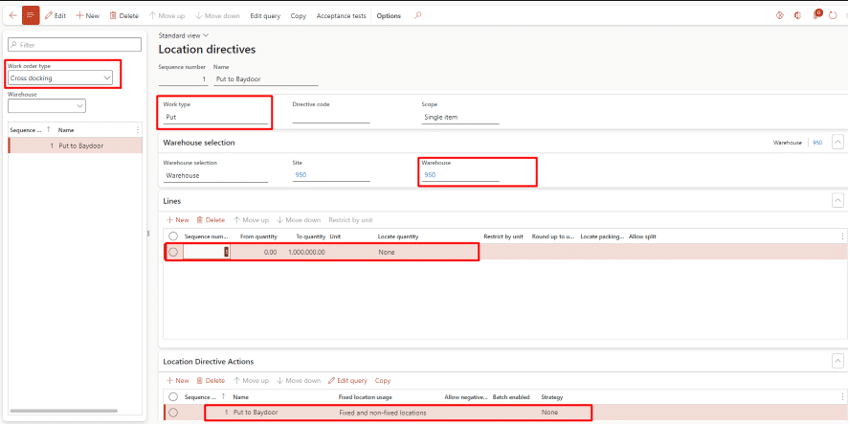
In the Edit query, we have left location as blank, but it will automatically direct the stock to Baydoor as we have final shipping location type has set to Baydoor in warehouse management parameters. However, the location of Baydoor can be set in the Edit Query section.
Step 5: Create a mobile device menu item
Either create the mobile device menu item to process the work for cross-docking or simply add work class ID of CrossDock in work classes in the Purchase Put away menu item. We have done the same thing where we have created a Purchase put menu item, selected the Mode “Work” and enabled the “Use existing work”. The work is user directed. Besides adding Purchaser work class, we have also added CrossDock workclass, so that the stock as soon as receive will be put away in Baydoor.
Executing the Cross-Docking Scenario
Following steps are involved in cross-docking operation execution:
- Create a Purchase order and confirm it
- Create a sales order, mark it against purchase order and release it to warehouse
- Process Wave if auto wave processing is not enabled in wave template.
- Planned cross-docking line is created under load lines fast tab
- Cross-docking work is created (put-away work is also created if the inventory quantity in purchase order exceeds that in sale order). When inventory quantities of both SO and PO match, no put-away work will be created.
- Process and complete the cross-docking work via mobile device by providing target license plate or work ID.
- If put-away work is created, complete that work in the mobile device as well.
- After work completion, post product receipt, confirm shipment and post packing slip accordingly.
Scenario 1: Purchase order creation
Create a purchase order by providing vendor account and site, warehouse.
The order is created with 10 quantities and confirmed.

Scenario 2: Sales order creation
Create a sales order with customer account and same warehouse as that of purchase order
Add the SO line with the same item as that of PO and provide the less quantity than PO.

Select Inventory and go to Marking.
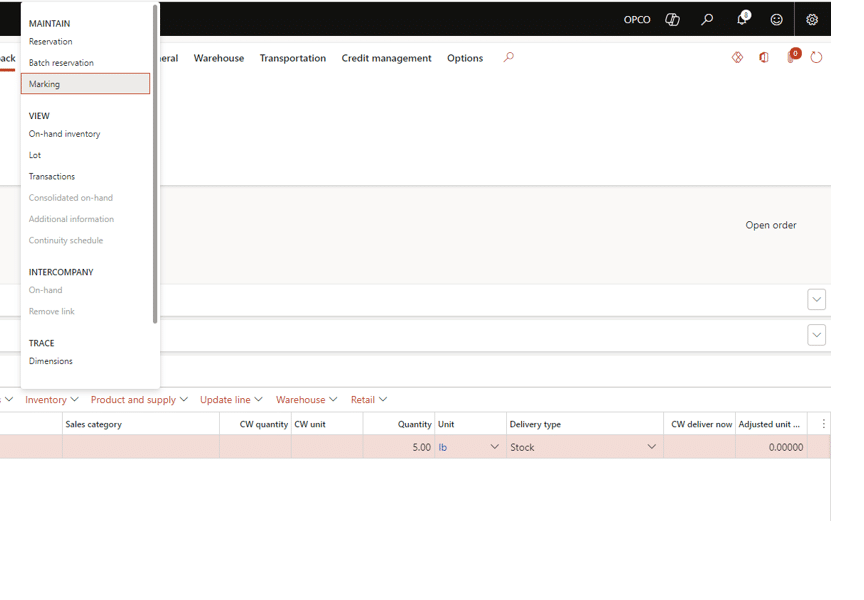
Mark the purchase that was created previously.
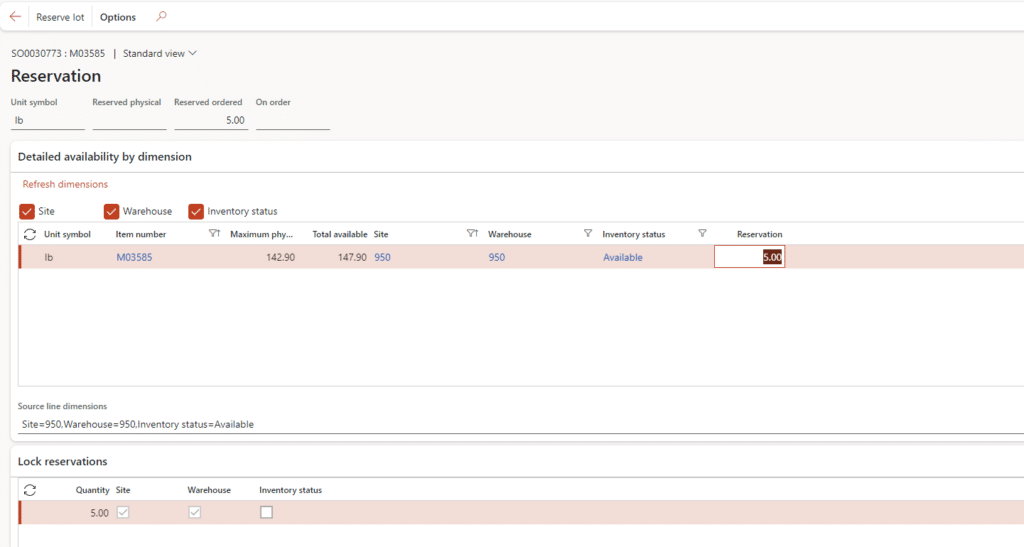
Now go to Reservation in inventory tab and check if inventory is reserved.
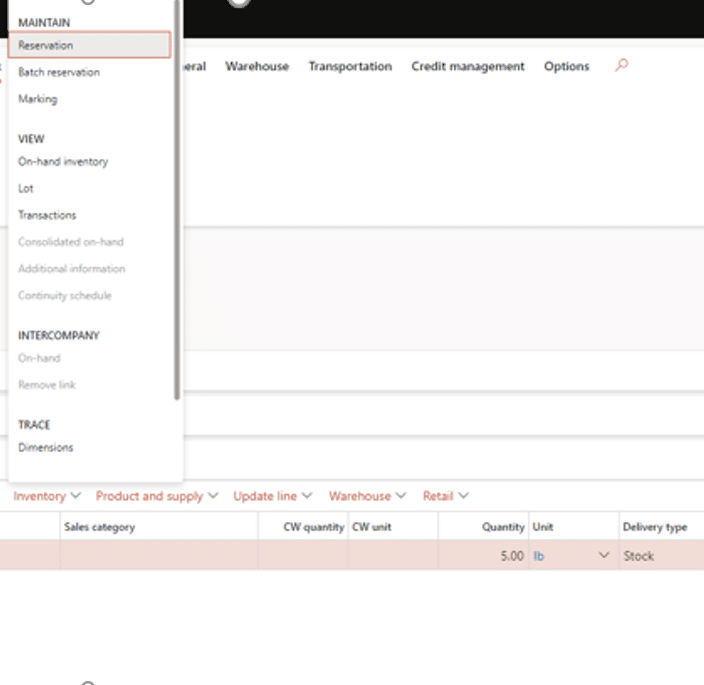
Now release SO to warehouse.
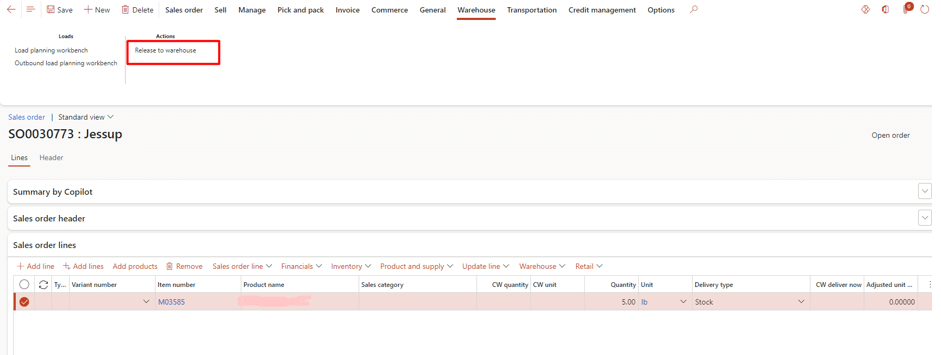
Select the Warehouse tab and go to shipment details.

As our wave template is not set to auto processing of waves, we will go to Wave ID to process it.

Process the wave.

No work should be created.

Go back to shipment details and select Planned cross-docking in load lines fast tab.
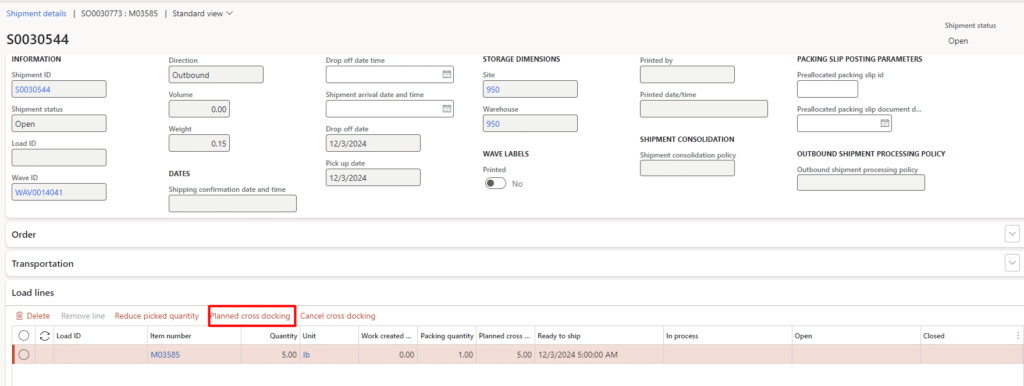
Planned cross-docking has been created.

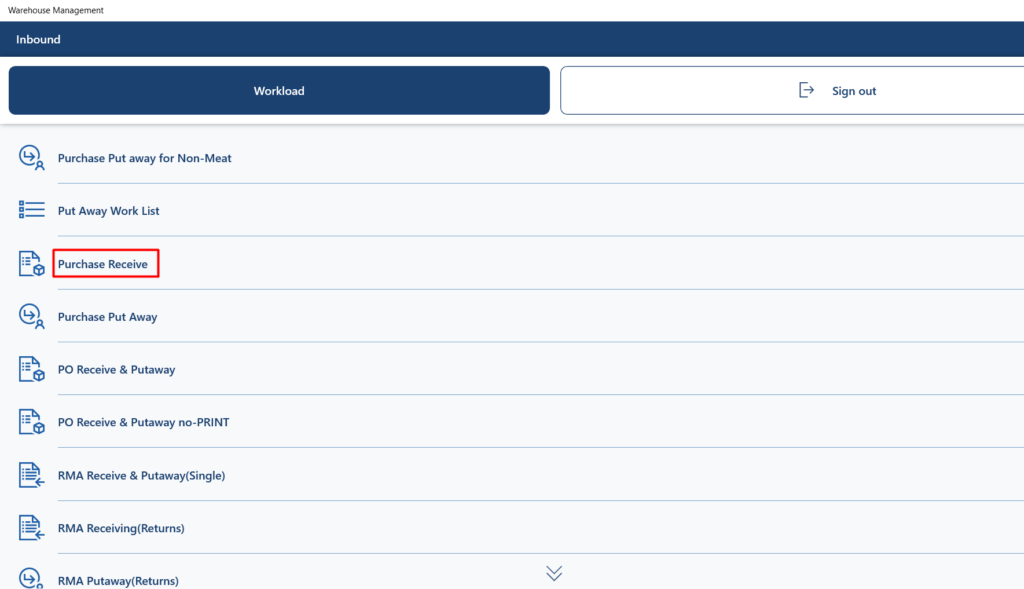
Now go to Warehouse management app, login and go to main menu. Select Inbound.
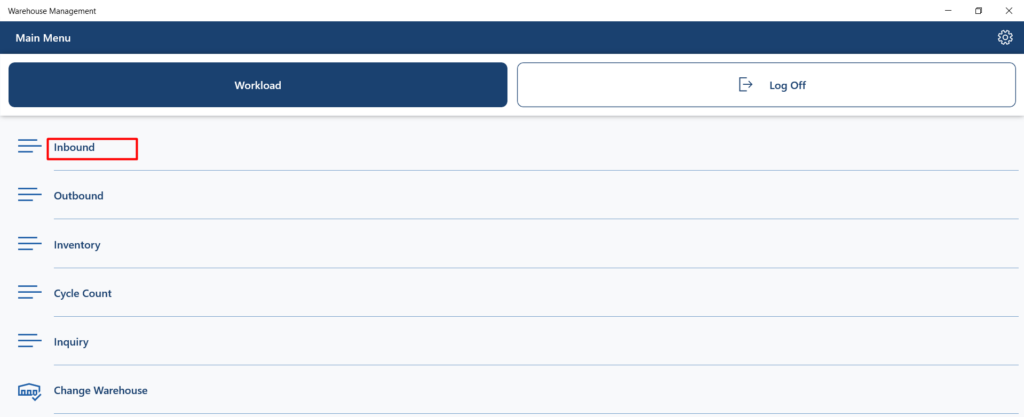
Go to Purchase receive menu item.
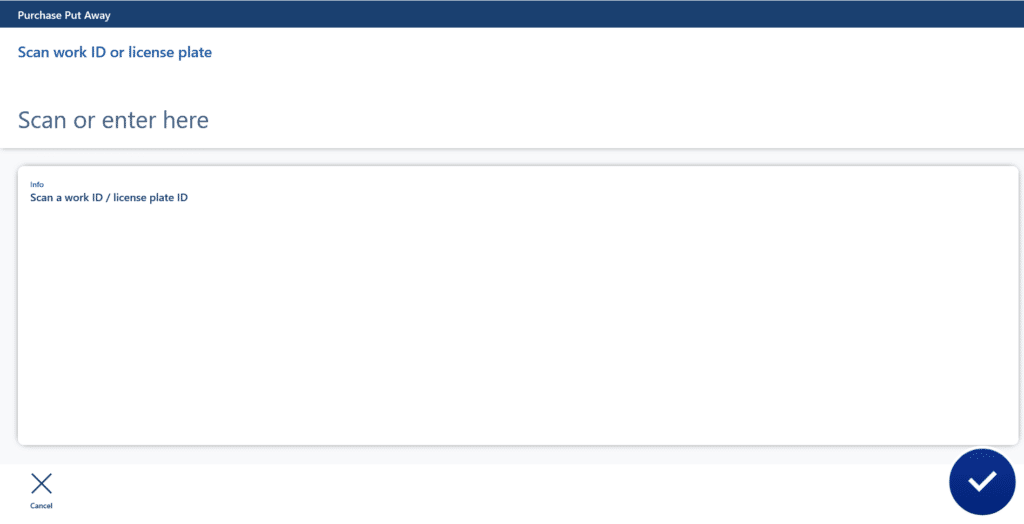
Provide the PO that was previously created.

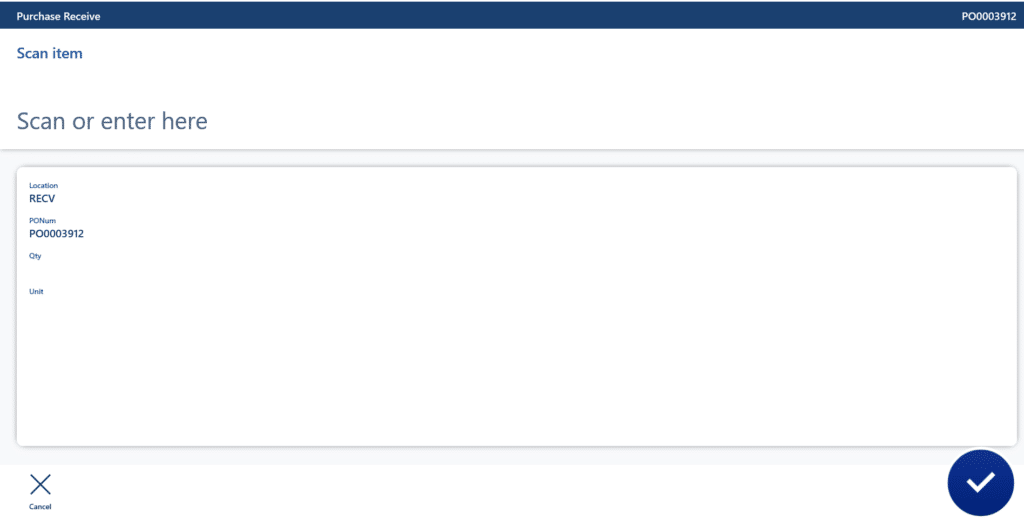
Now scan the item that needs to be received.

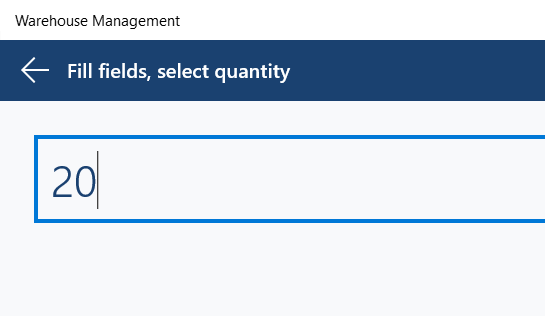
Provide the quantity to be received.

We are over-receiving the inventory.
Confirm the values.

Scan a batch number against which inventory should be received.

Work is completed now.
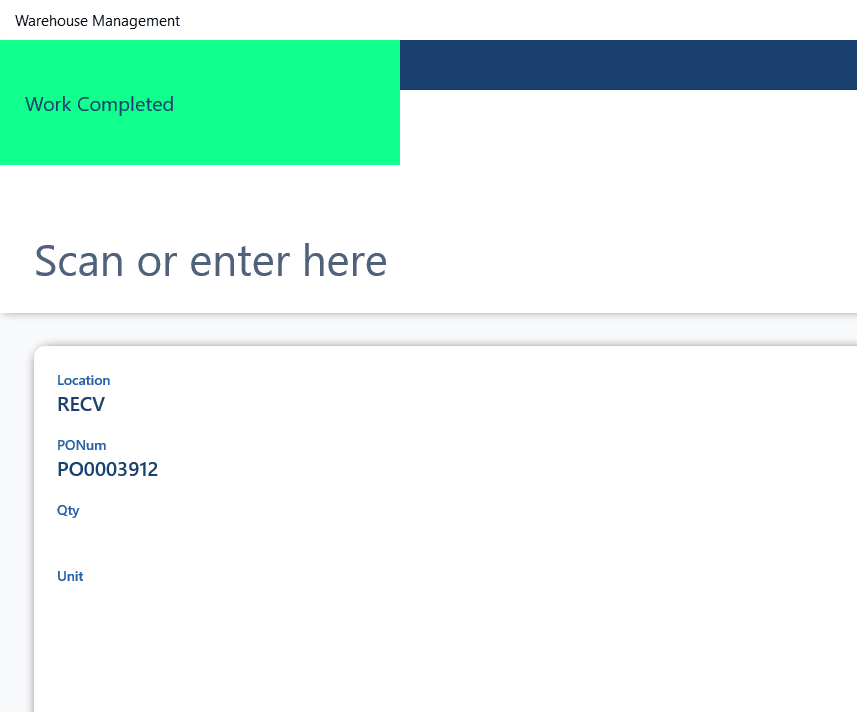
Now go to All work and check that two works are created. One for cross-docking and the other one is for purchase put-away with the same license plate.

Again go to Warehouse management app and select Purchase put away menu item.
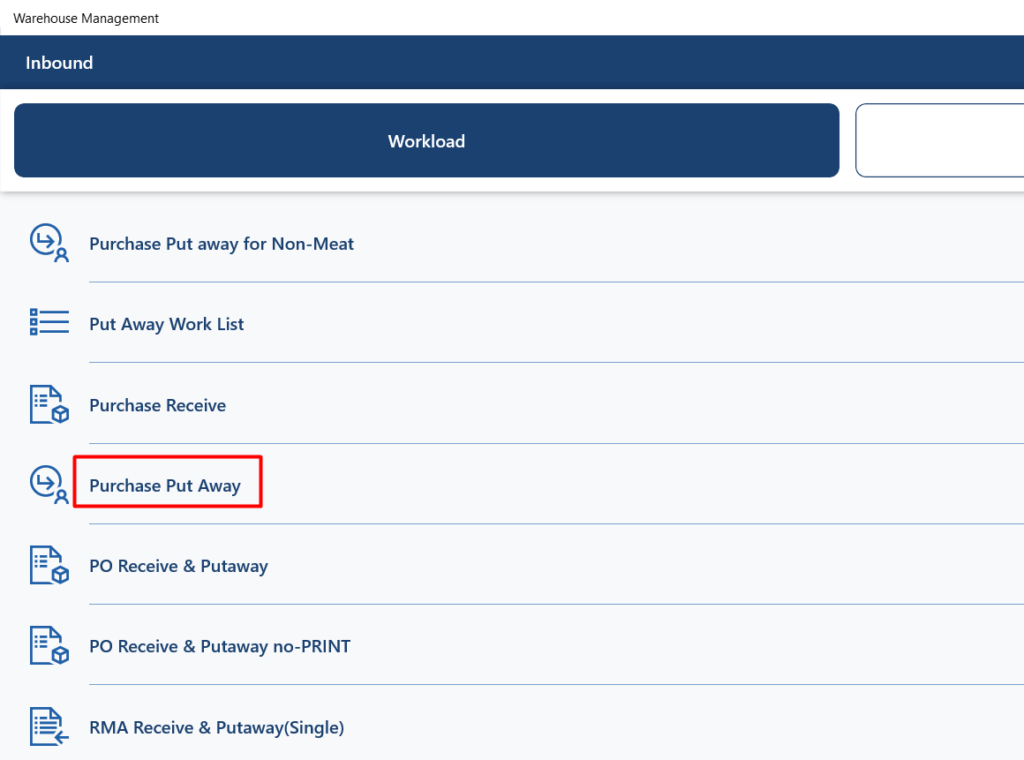
Scan the license plate or work ID.
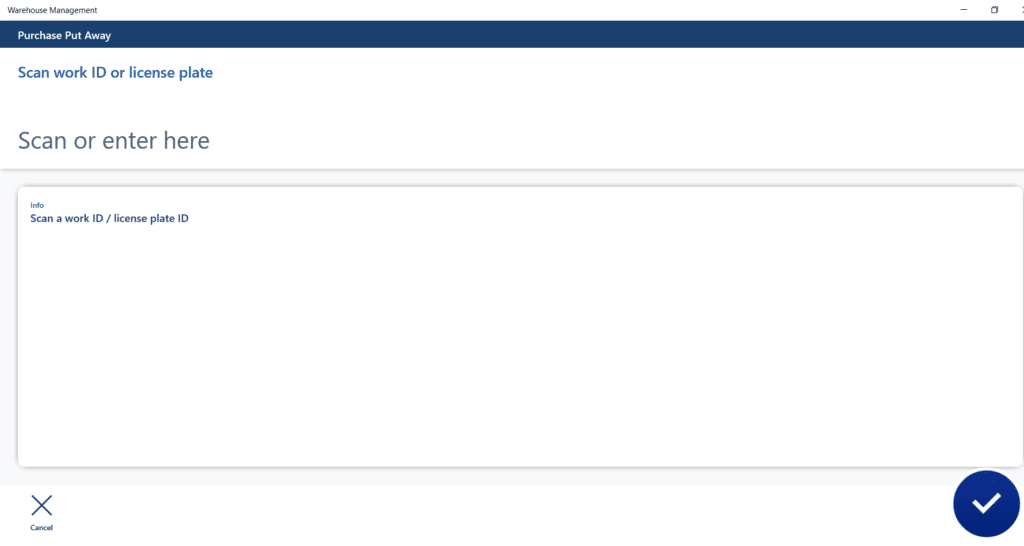
In this case, we are providing the license plate against which the works were created.

Confirm the values.
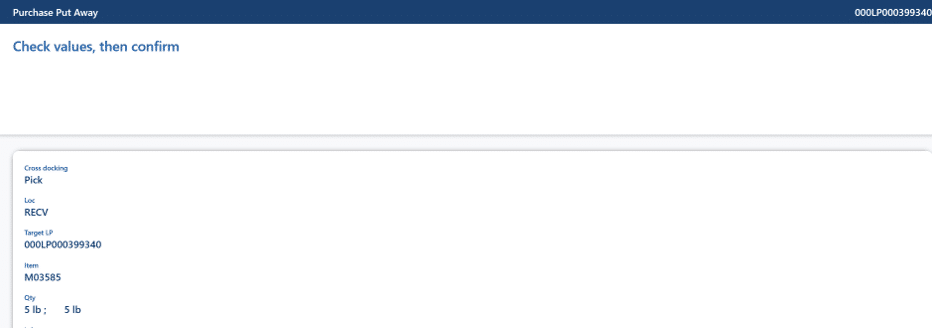
Now scan the target license plate against which the inventory needs to be put on Baydoor.
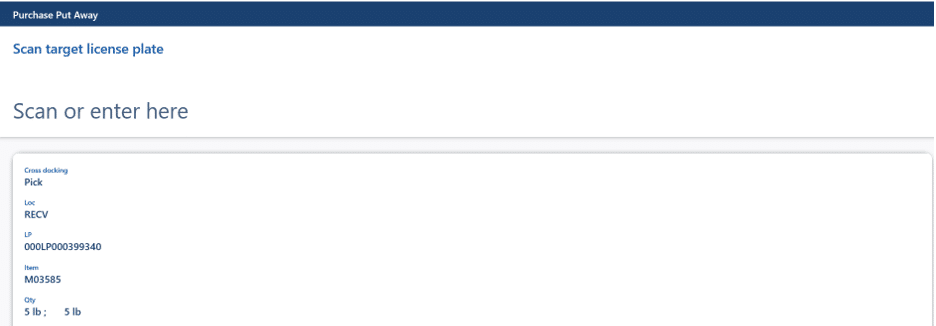
Check and confirm the values.
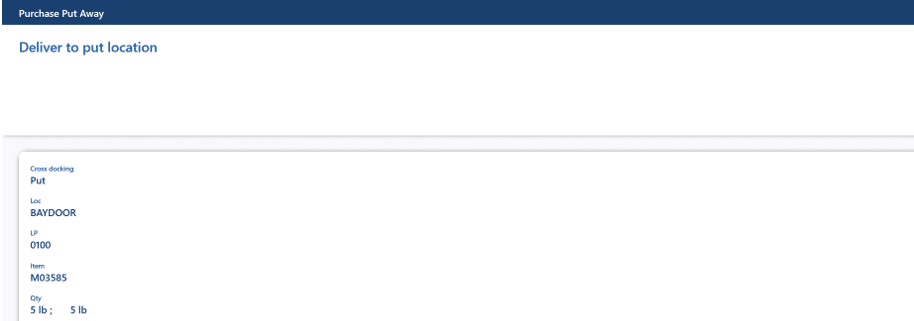
Go to all work form and check that the cross-docking work will be disappeared as it is the closed status. Only left is, put away work.

Go to purchase put away menu item and provide the license plate or work ID.
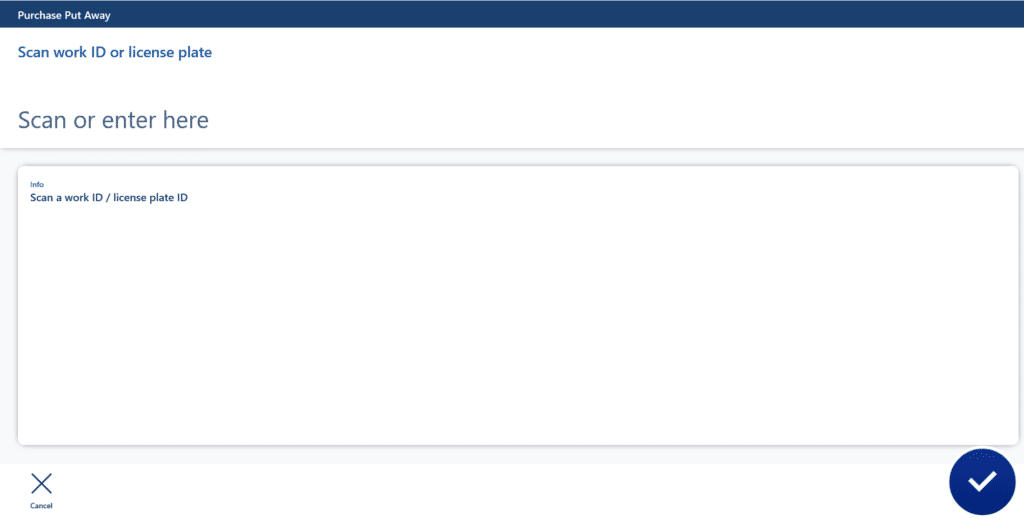

Check and confirm the values.
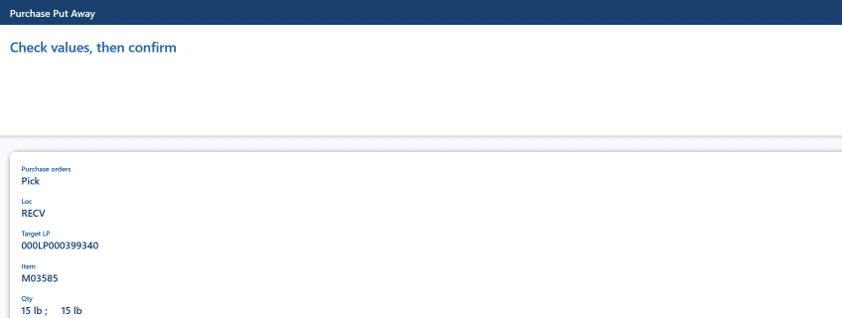
Now scan the location on which excess inventory needs to be put-away.

Check and confirm the value. The location can be over-ride if there is a requirement.
The work is completed now. Afterwards, it is imperative to post product receipt, confirm shipment and ultimately post the packing slip.
Summing up
Cross-docking offers businesses a powerful way to streamline supply chain operations, reduce storage costs, and accelerate order fulfillment. By leveraging its robust features in Dynamics 365 warehouse management, your organization can achieve greater efficiency, improve inventory flow, and enhance customer satisfaction.
Contact us at marketing@confiz.com to learn how our experts can help you integrate and optimize cross-docking operations in Dynamics 365 Finance and Operations.


