
Creating custom workspaces in Microsoft Dynamics 365 for Finance and Operations allows users to tailor their experience to meet specific business needs. Workspaces provide a centralized hub where users can access relevant data, actions, and reports.
In this blog, we’ll explore custom workspaces in Dynamics 365 Finance and Operations, their benefits, and provide a step-by-step guide to help you get started.
What are custom workspaces in Dynamics 365 Finance and Operations?
Custom workspaces in Dynamics 365 Finance and Operations are personalized dashboards that allow users to access key data, tasks, and reports in one place. They enhance productivity by consolidating relevant information, streamlining workflows, and reducing navigation time. Users can customize these workspaces with specific tiles, lists, and charts to match their roles and business needs, improving efficiency and decision-making.
What are the benefits of using custom workspaces?
Using custom workspaces in Dynamics 365 Finance and Operations (D365 F&O) offers several benefits, including improved efficiency, personalized user experience, and better data accessibility. Here are the key advantages:
- Boosts productivity: Centralized access to essential tools, reducing navigation time.
- Personalized experience: Customizable for individual roles with quick access features.
- Faster decisions: Real-time KPIs and Microsoft Power BI integration for better insights.
- Efficient workflows: Automates task-specific functions and direct-action execution.
- Simplifies training: Easier navigation reduces reliance on IT support.
- Better data visibility: Quick access to critical data and analytics.
- Seamless integration: Connects with Excel, Power BI, and Power Automate for enhanced collaboration.
Steps to create a custom workspace in Dynamics 365 Finance and Operations
1: Enable personalization
Ensure that personalization is enabled for the environment:
- Navigate to System Administration > Setup > Personalization.
- Ensure the required users have the Manage and Save permissions.
2: Create a new workspace
- Navigate to the dashboard (home page).
- Click the Personalize this page option (usually under the gear icon).
- Select Add a workspace.
- A new, empty workspace will be created.
3: Configure the workspace
Rename the workspace
- Right-click on the new workspace’s title.
- Select Personalize and enter a custom name.
Add tiles, lists, and links
- Open a relevant form or list page.
- Click on the Options tab in the top menu.
- Select Add to workspace and choose the target workspace.
- Define the tile type (count tile, direct link, etc.).
- Configure the display properties.
Add Power BI Reports (Optional)
- If Power BI is embedded, you can add a Power BI dashboard to the workspace.
- Navigate to System Administration > Setup > Power BI.
- Enable and configure the necessary reports.
4: Save and publish
- Once customized, the workspace is available on the dashboard.
- Users can reset their workspace if needed by removing personalization.
Advanced custom workspaces (Using development)
For deeper customizations, you can develop a custom workspace in Visual Studio by Creating a new form of type Workspace. Adding required data sources, grids, and tiles.
Here we’ll explore how to create a workspace from the backend using X++:
1: Define new menu item for workspace
Create a display menu item and define your workspace form in the Object property.
2: Create new form for the workspace
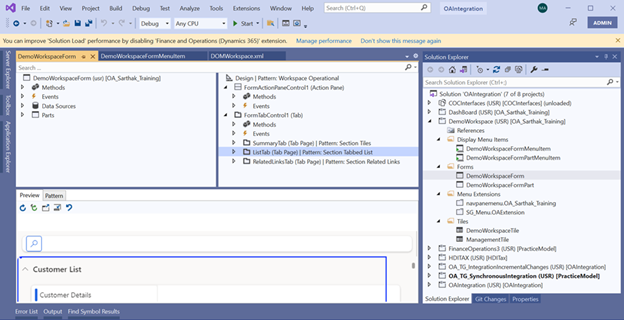
This form will host the tiles, lists, links, and other elements that make up your workspace in Dynamics 365 finance operation (D365FO).
3: Create tile element for the custom form (D365FO) X++
In Microsoft Dynamics 365 for Finance and Operations, a tile is a UI component that provides users quick, visual access to key data and actions. Tiles are often used within workspaces to display summarized information or to provide navigation to other parts of the application.
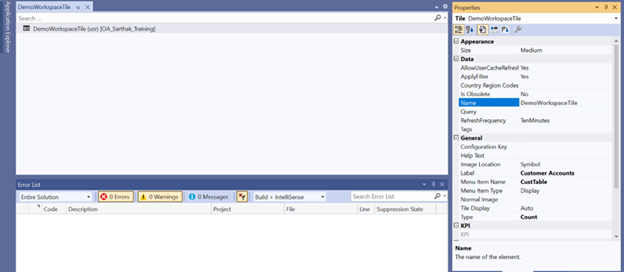
In the custom workspace form (d365fo), we must add elements to complete the workspace form from the backend. In this step, we are creating a tile and setting the menu item name to form name.
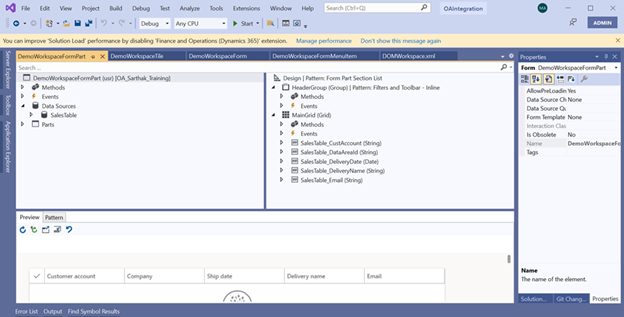
4: Create form part for the workspace form D365 F&O x++
In Dynamics 365 Finance and Operations, a form part is a reusable component that represents a section of a form.
5: Create menu item of form part (D365 F&O)
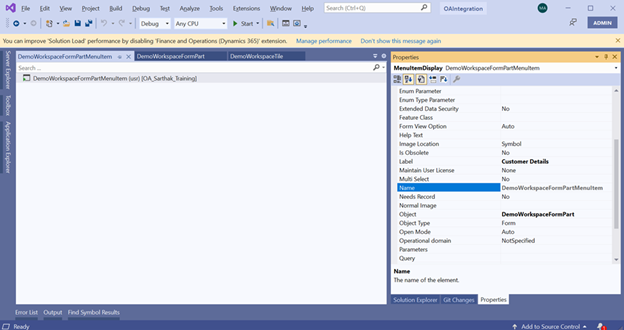
Creating a menu item for a form part in Microsoft dynamics 365 for Finance and Operations allows you to add the form part to navigation menus and make it accessible to users.
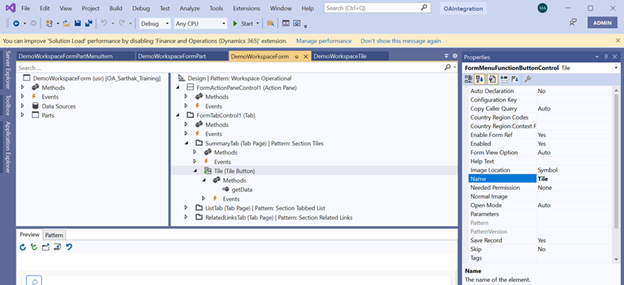
6: Add necessary elements to the workspace form
Create a tile button on the custom workspace form and add your tile name to the tile property.
Create a form part on the custom workspace form D365fo. Add your form part menu item to the menu item name property and set the run mode property to remote.
The difference between the “Local” and “Remote” settings in the “Run mode” property of a form part is that when the form part is called Remote, there is no coupling between the form part and the caller form. So, no linking of data sources and no element.caller() object. And as Remote the form part is executed in a separate session. With Local it is the other way around. You can link data sources, and you can work with element.caller().

In Dynamics 365 Finance and Operations (D365FO), the Related Links tab is a feature in workspaces and forms that provides users with quick access to additional forms, reports, or pages that are contextually related to the current workspace or form. This tab enhances navigation by allowing users to quickly jump to other relevant areas of the application without leaving the current context.
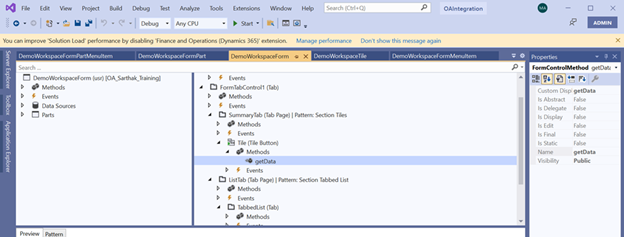
7: Show record count on tile
To show the record count on the tile, you need to override the getdata() method of the tile button.
[Form]
public class DemoWorkspaceForm extends FormRun
{
[Control(“MenuFunctionButton”)]
class Tile
{
/// /// Count no. of record on tiles ///
/// ret
public TileButtonControlData getData()
{
Custtable custtable;
int customerCount;
TileButtonControlData ret;
        ret = super();

        select count(RecId) from custtable;
        customerCount = (CustTable.RecId)
        ret.strTileData(int642Str(CustTable.RecId));

        return ret;
    }
}
}
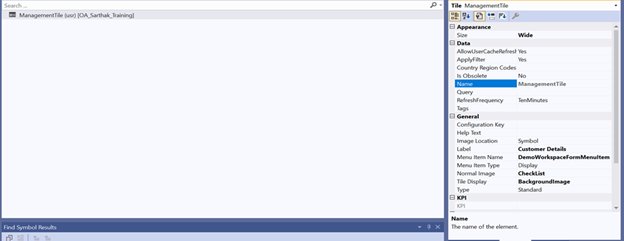
8: Create a tile for the workspace form
In this blog, we created two tiles, one for the custom form and the second for the workspace form. This tile is used for the navigation menu which is the workspace from the dashboard.
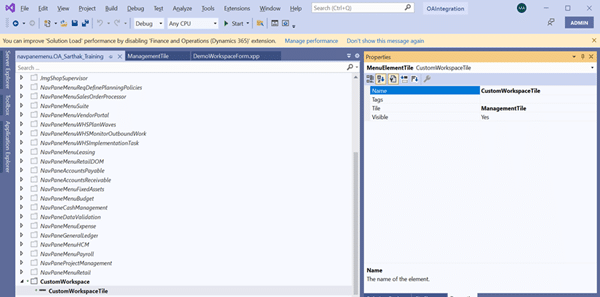
9: Create an extension of the navigation menu
The navigation menu name from the backend is navpanemenu. Create an extension and add a tile that has a workspace form menu item.
Workspace from frontend
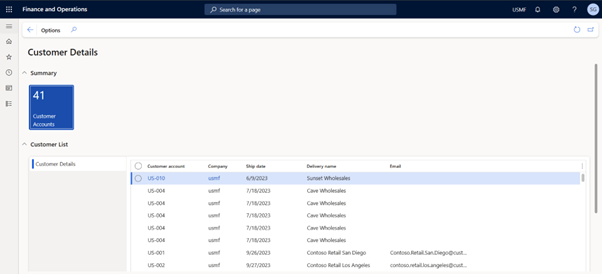
Add workspace to your custom model

Summing up
Custom workspaces in Dynamics 365 F&O provide a personalized, streamlined experience, enabling users to access key tasks, data, and reports efficiently. By reducing manual effort and enhancing navigation, they drive productivity and smarter decision-making across business operations. Implementing custom workspaces helps businesses optimize workflows and improve system usability.
Need help setting up custom workspaces? Contact us at marketing@confiz.com to get started!