
In Microsoft Dynamics 365 Finance and Operations (D365 F&O), security roles control what users can see and do within the system. While standard security roles cover common business functions, organizations often have unique processes that require customized access.
A custom security role ensures that users have only the necessary permissions, improving data security and compliance while enhancing operational efficiency. Whether you need to restrict access to sensitive financial data or grant specific permissions to sales teams, creating a custom security role in Dynamics 365 allows you to tailor user access based on your organization’s needs.
In our last blog, we explored Dynamics 365 security in detail. Now, let’s walk you through the process of creating custom security roles in Dynamics 365 Finance and Operations.
Getting started with creating custom security role in Microsoft Dynamics 365 Finance and Operations: Simple steps
Creating a security role in Microsoft Dynamics 365 for Finance and Operations involves defining roles, duties, and privileges to manage user access. Here’s a simple step-by-step guide for creating Dynamics 365 for Finance and Operations security roles, including details on where to add screenshots for better understanding.
Step 1: Access the security configuration page
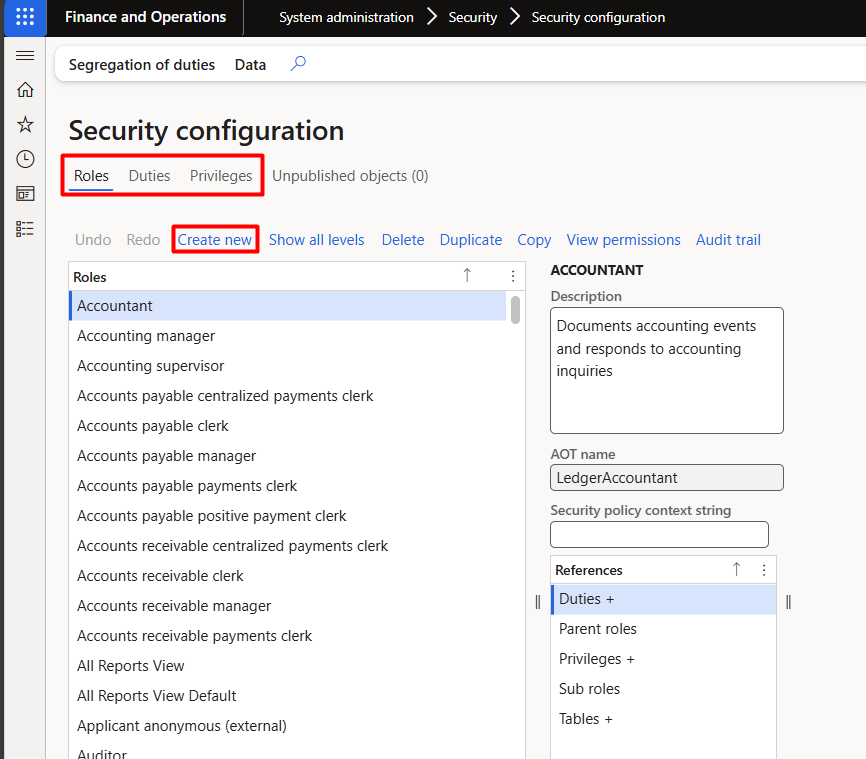
- Log in to your Microsoft Dynamics 365 Finance and Operations instance with administrative privileges.
- Navigate to Modules → System Administration → Security → Security Configuration.
Step 2: Create a new security role
- In the Security Configuration workspace, go to the Roles tab.
- Click New to create a new role.
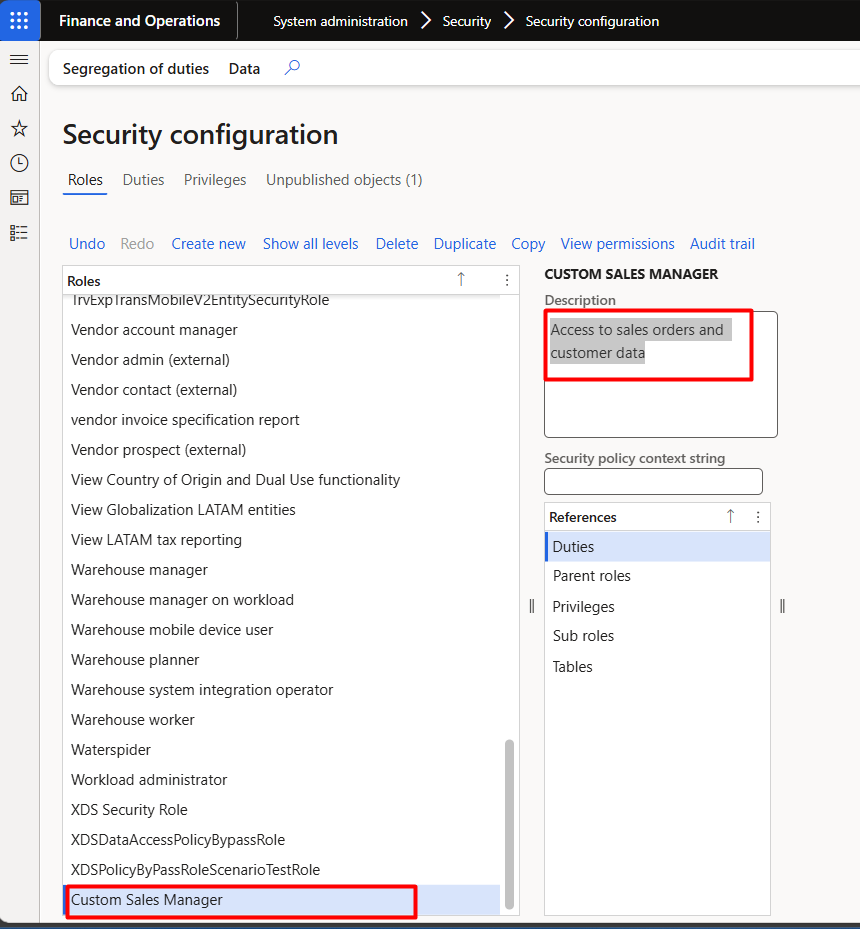
- Enter the following details:
o Role Name: Provide a name for the role (e.g., ” Custom Sales Manager “).
o Description: Add a brief description of the role (e.g., “Access to sales orders and customer data”).
Step 3: Assign duties to the role
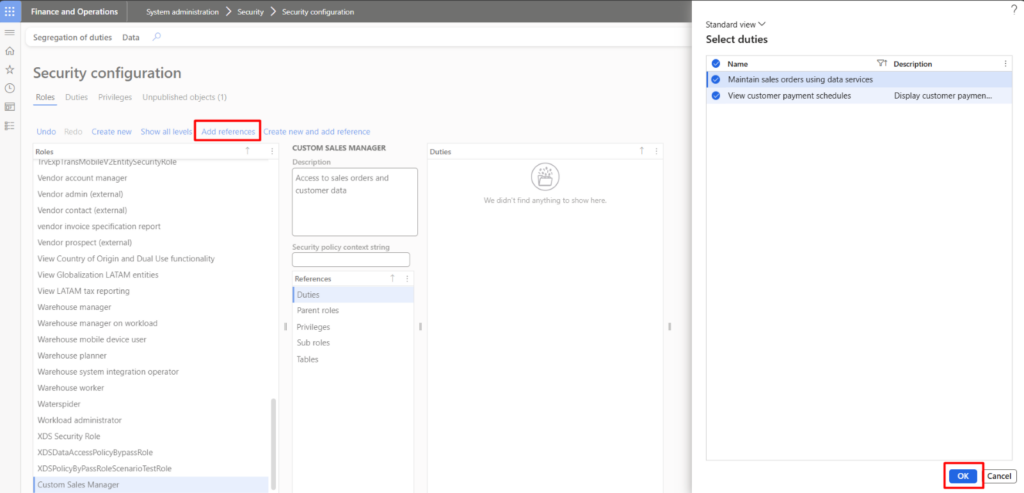
- In the Role Details page, go to the Duties tab.
- Click Add to assign duties to the role.
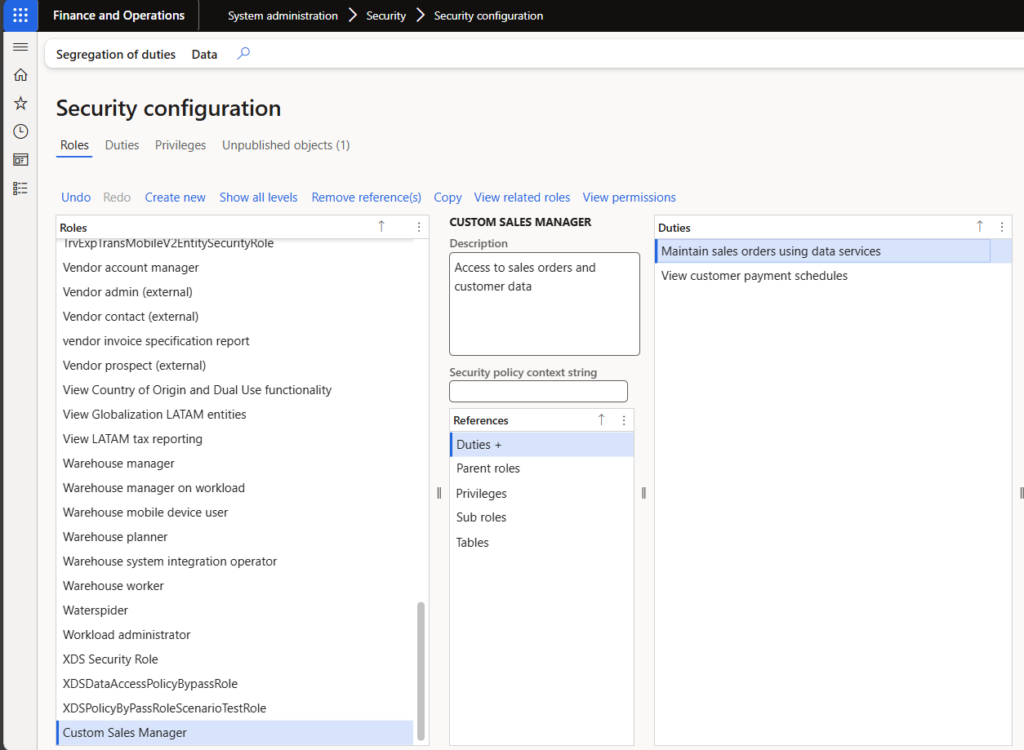
- Search and select the duties that align with the role’s responsibilities (e.g., ” Maintain sales orders using data services ” or ” View customer payment schedules “).
- Click OK to add the duties to the role.
Step 4: Assign privileges (Optional)
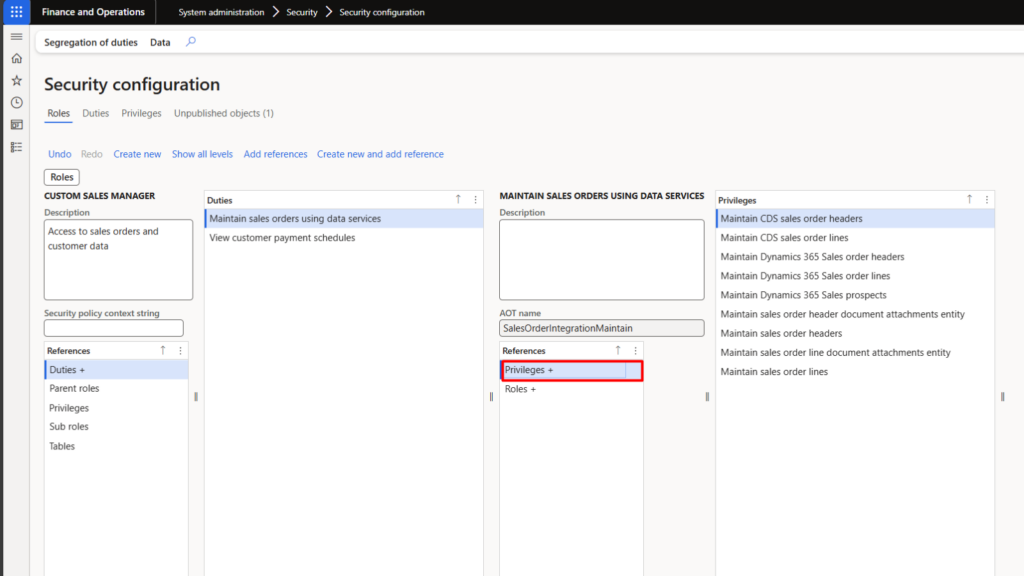
- If needed, go to the Privileges tab in the Role Details page.
- Click Add to assign specific privileges directly to the role.
- Search and select the required privileges (e.g., “View Sales Orders” or “Edit Customer Records”).
- Click OK to add the privileges.
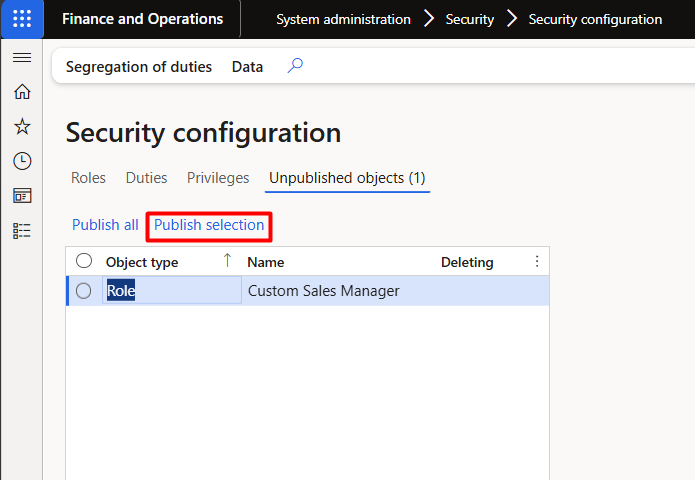
- Publish the security role.
Step 5: Assign the role to users
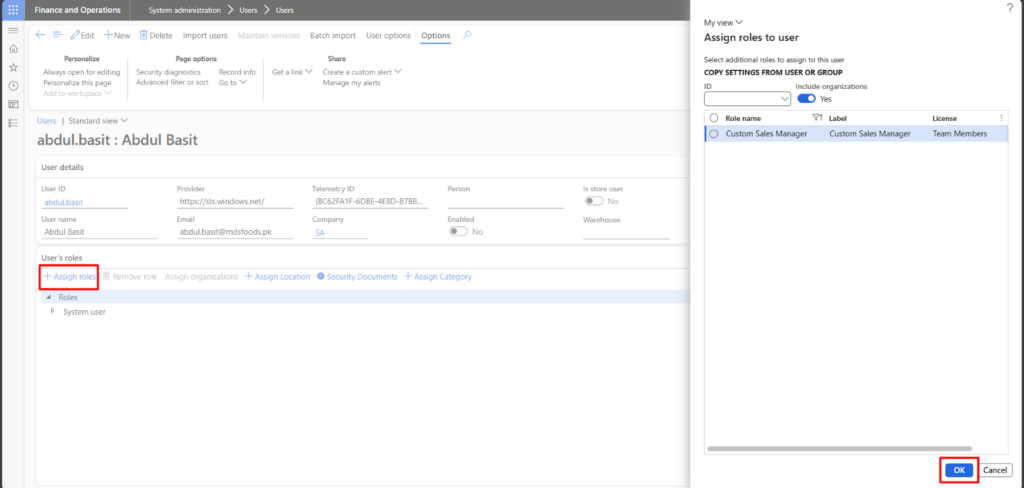
- Go to Modules → System Administration → Users.
- Select the user(s) you want to assign the role to.
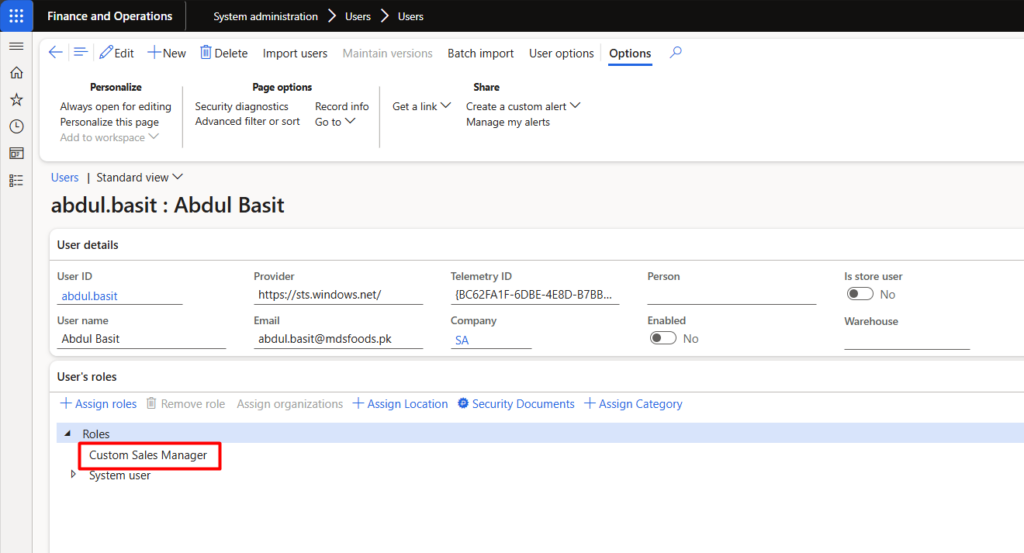
- In the User Details page, go to the Assign Roles section.
- Click Assign Roles and select the newly created role (e.g., “Sales Manager”).
- Click OK to assign the role to the user.
Conclusion
Microsoft Dynamics 365’s role-based security model provides a flexible and scalable way to manage user access and permissions. By understanding the relationship between roles, duties, and privileges, you can design a security framework that ensures data security, compliance, and operational efficiency. We hope this guide provides you with the insights needed to successfully create a custom role in Dynamics 365.
Looking to implement or optimize security in your Microsoft Dynamics 365 environment? Contact us today at marketing@confiz.com to learn how we can help you design and configure roles, duties, and privileges tailored to your organization’s needs. Let’s secure your D365 system together!