How to perform MPOS customization in Dynamics 365 F&O from scratch: A step-by-step guide

June 18, 2024

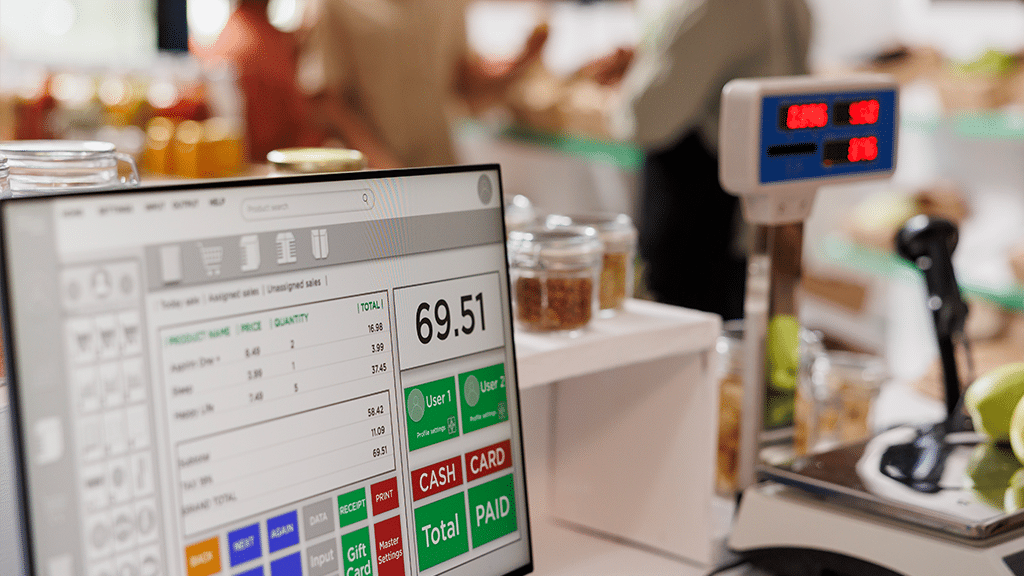
Microsoft MPOS technology is a modern point-of-sale system that runs as a Universal Windows Platform (UWP) app on Windows devices. One of the key features of Microsoft MPOS (Modern Point of Sale) is its flexibility and extensibility.

What is an MPOS system?

MPOS (Modern Point of Sale) is a component of Microsoft Dynamics 365 for Finance and Operations (F&O) that provides a comprehensive retail management system. MPOS is designed to offer a seamless and efficient point-of-sale experience, integrating various retail operations such as sales, customer orders, inventory management, and more. Here are some key features of MPOS:

  1. Sales transactions: MPOS allows retailers to handle sales transactions quickly and efficiently, including processing payments, applying discounts, and issuing receipts.
  2. Customer orders: It supports the creation and management of customer orders, including special orders, layaways, and order fulfillment.
  3. Inventory management: MPOS provides tools for managing inventory in real time, including stock checks, transfers, and adjustments.
  4. Customer engagement: It enables personalized customer service by directly accessing customer profiles, purchase history, and loyalty programs from the point of sale.
  5. Mobility: MPOS is designed to work on various devices, including tablets and smartphones, allowing retail staff to assist customers anywhere in the store.
  6. Integration: It seamlessly integrates with other Dynamics 365 applications and modules, providing a unified and comprehensive retail management solution. MPOS enhances mobility, efficiency, and customer experience by enabling sales anywhere in the store, reducing wait times, and integrating seamlessly with business operations.

The fundamental workflow of MPOS explained

The Modern POS (MPOS) system operates in two modes: online and offline.

  • Online mode: In online mode, the POS client interacts with the Retail Server, which communicates with the Commerce Runtime (CRT) to handle business logic. The CRT processes requests and interacts with the database (DB) to retrieve or store data. The Hardware Station interfaces with peripheral devices like printers and barcode scanners, allowing the POS to control these devices effectively.
  • Offline mode: In offline mode, the POS client communicates with the Retail Proxy instead of the retail server. The Retail Proxy handles requests and processes business logic locally, ensuring the POS system continues functioning seamlessly even without a connection to the retail server.
    The flow is visually represented in a diagram.

CRT

CRT contains the core business logic written in C# and compiled into .NET assemblies. The POS, as a thin client, relies on CRT for business tasks. It sends requests to the Retail Server, which calls CRT to process and return responses.
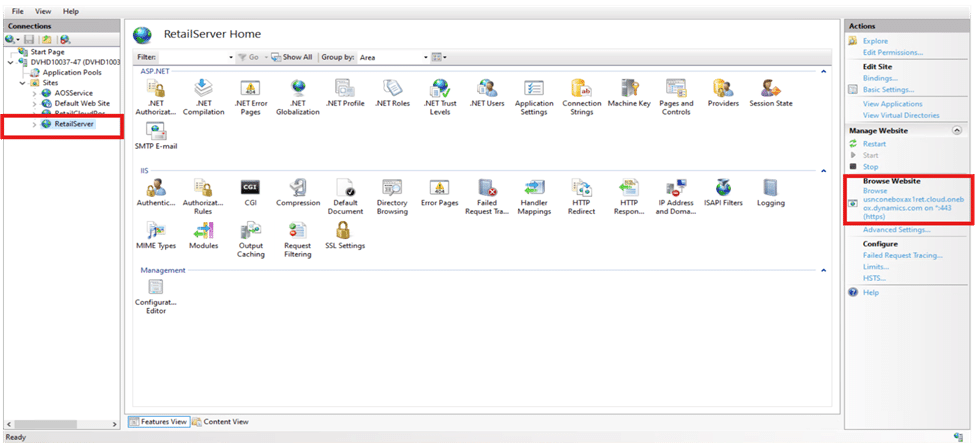
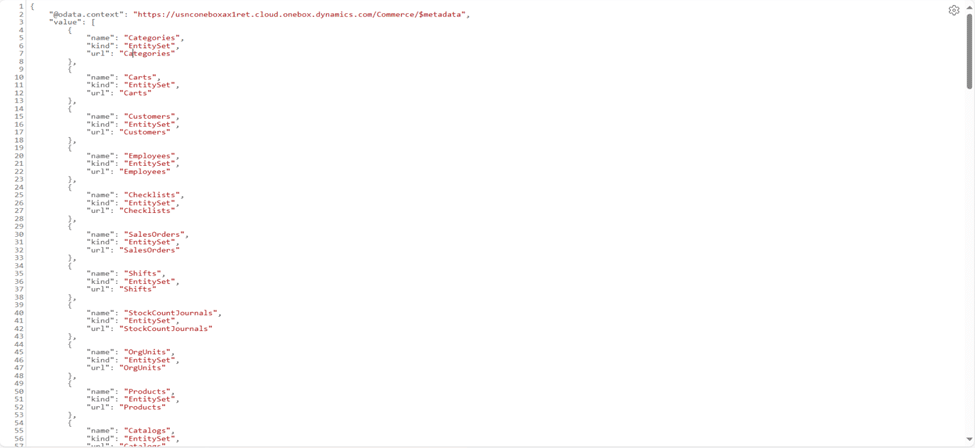
Retail Server

The Retail Server is a middle layer that processes requests from the POS client and calls the Commerce Runtime (CRT) to execute business logic. It then returns the results to the POS, enabling efficient communication and centralized business logic handling.

Retail Proxy

Retail Proxy works similarly to the Retail Server in offline scenarios.

Hardware Station

Hardware Station is the interface where peripheral devices like printers and barcode scanners are attached. The POS client can communicate with and control these devices for seamless hardware integration.

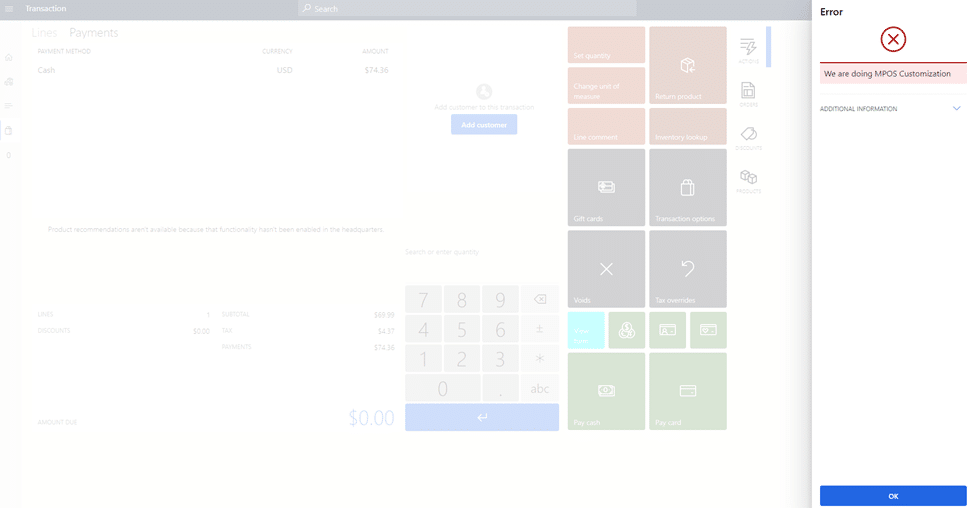
What is MPOS customization?

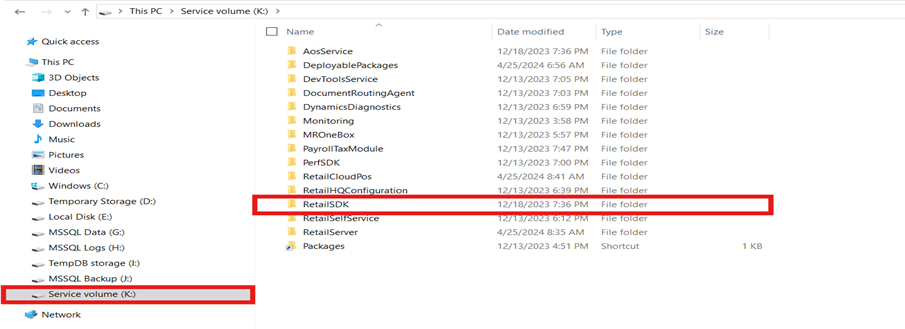
MPOS customization involves tailoring MPOS systems to fit specific business needs. This includes modifying the user interface, integrating existing software, and adding new features to improve efficiency and user experience. Using the Commerce SDK’s MPOS extension feature, businesses can enhance or change functionalities, add validations, and introduce custom features, making the system adaptable to different retail environments.

In the following areas, we can expand the existing Microsoft MPOS functionality to some extent depending on the business scenario:

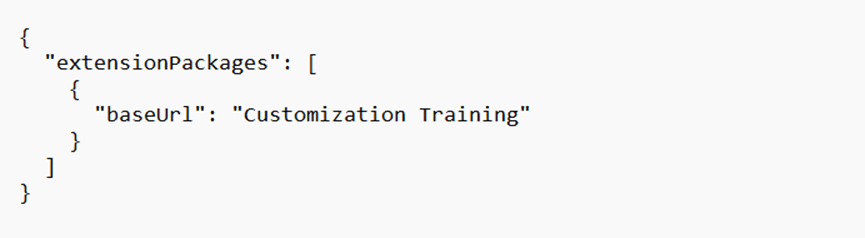
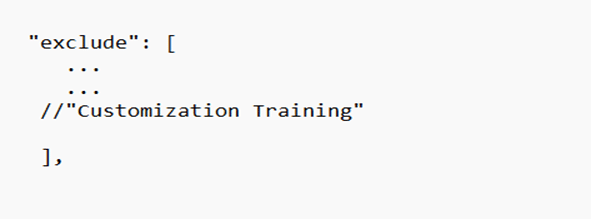
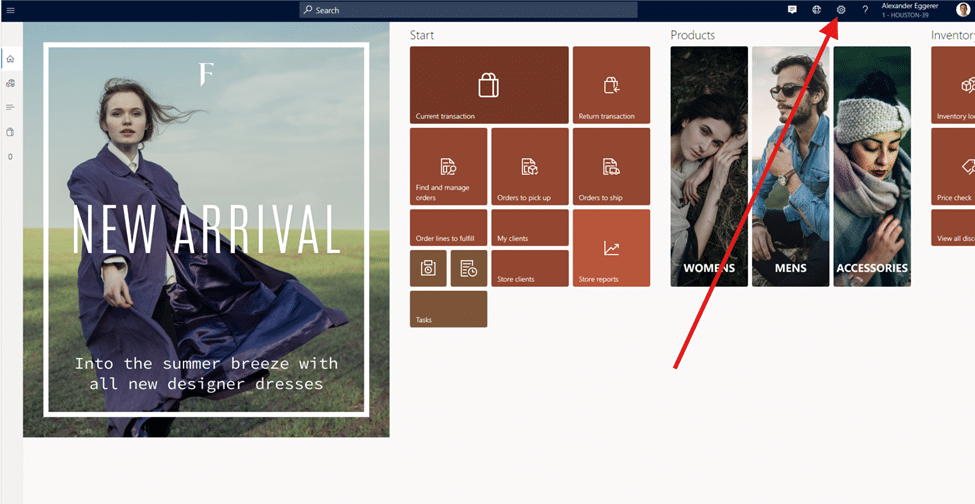
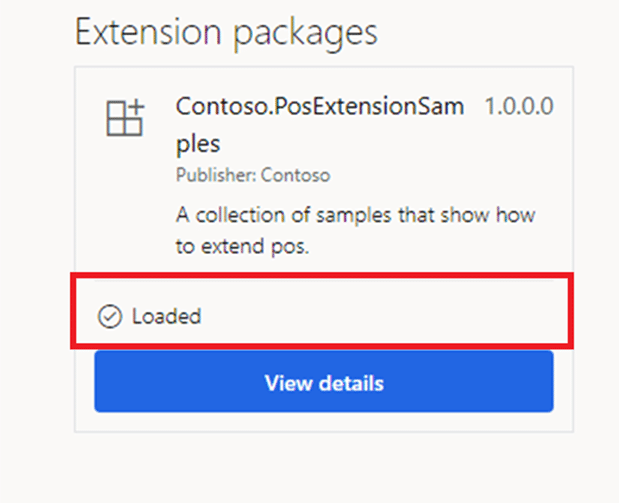
  • Extend the MPOS user interface (UI): Customizing MPOS involves adding custom columns, app bar buttons, and controls as needed for different views. The screen layout designer can be used to configure the cart view and the welcome page. Customization can be achieved for other views by writing custom code to extend their functionality.
  • Override POS business logic: To enhance the business logic of the POS, you can extend it by overriding the POS request handlers. This allows you to incorporate custom logic into the POS system to meet specific business requirements.
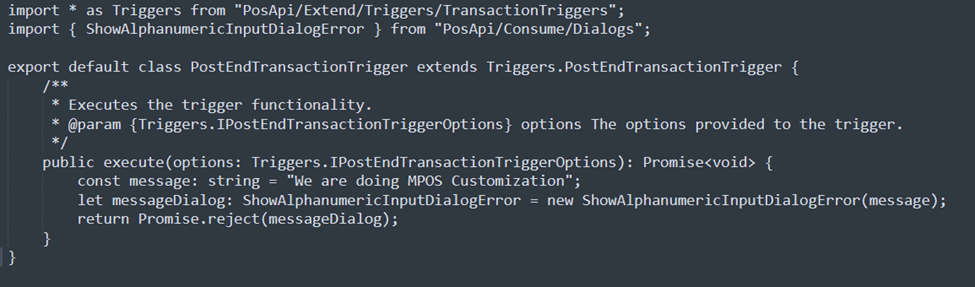
  • Add pre-triggers and post-triggers: Enhance the POS system by incorporating custom logic that can be executed before or after any POS operation, allowing for more tailored and flexible functionality.
  • Consume APIs: The POS system provides APIs and user experience (UX) controls that can be utilized in extension scenarios. These features enable developers to enhance and customize the POS functionality to specific business needs.
  • Add custom operations: Expand the POS system’s functionality by introducing custom operations to perform specific tasks and achieve custom functionality.

For effective MPOS customization, you will need a strong command of C# development language, .NET Framework, JavaScript, Typescript, Knockout.js, HTML, and CSS. Understanding these languages is essential for modifying the user experience, enhancing functionality, and adding custom features.

MPOS customization is essential for businesses aiming to tailor their point-of-sale systems to specific needs. Customization can involve altering the user interface, integrating with existing MPOS software provided by Microsoft, and ensuring the MPOS solutions fit perfectly within your operational framework. Whether adding new features or modifying existing ones, MPOS customization offers the flexibility required to adapt to ever-changing market demands.

MPOS Customization pre-development checklist to follow

Before beginning development, checking key components is important to ensure your machine is ready for use. Here is a checklist to follow:

1: Ensure that your retail server is operational

Search for “IIS” in the Windows search panel and click on the result to open the Internet Information Services (IIS) window.

In the left sidebar, navigate to the machine name and click on it, then navigate to Sites and click on it. This will reveal a menu item for the Retail Server. Click on it. Information about the Retail Server will then appear in the right sidebar.
Click on the URL to open it in your browser. A text message indicating the status of the Retail Server will appear.

2: Verify that the commerce is operational

You can verify this by adding /Commerce to the root URL.

3: Check the database connection and the health of the retail server

To perform a health check, add the following query string to the root URL which is:

/healthcheck?testname=ping.

4: Perform a full sync job via the channel database to confirm that all jobs are running smoothly

To initiate the full sync job via the channel database, log in to Headquarters (HQ). Next, locate the channel database using the search box at the top middle of the HQ interface.

Once you have successfully completed these steps, your MPOS customizations are ready to proceed.

How to perform MPOS Customization in Dynamics 365 Finance and Operations

You are now ready to perform the customization. Here are the steps to get started:

Step 1: Find Retail SDK in the root directory

To start customizing MPOS, the first step is to identify the root directory of the virtual machine (VM) where the RetailSDK folder is located.
If you are using a Cloud VM, the root directory is typically “K.” However, if you are working with a local directory, the root directory is usually “C.” This step is crucial for locating the necessary files for MPOS customization.

Step 2: Shift the Retail SDK folder

After locating the Retail SDK folder, check for a folder named “update” within the Retail SDK directory.
If the “update” folder exists, copy the Retail SDK from there; otherwise, copy it from the main Retail SDK directory. It is advisable to unblock the folder and copy it to a separate directory, such as the music or pictures folder. This approach helps keep the development SDK in a separate location rather than the root SDK.

Step 3: Run the build command on Retail SDK

With the Retail SDK successfully relocated, the next step is to run the default build using the command prompt in the newly located Retail SDK directory.

Running the default build typically checks and installs any necessary prerequisite tools and frameworks. If all requirements are already fulfilled, skipping this check and installation process would be more efficient. However, if nothing is installed, the build should proceed as usual and install the necessary components.
After installing, we should also stop checking for installations and update these checks to False, assuming that everything required is installed on the machine.
By default, these checks are set to True. If all prerequisites are installed, set them to False to skip unnecessary checks.
The check values can be modified in the dirs.proj file located in the RetailSDK directory.

Command is: msbuild /t:rebuild dirs.proj

Step 4: Customize the Retail SDK

Once the build is successfully executed, open the POS project in Microsoft Visual Studio.

It will appear like this in the Visual Studio.

To begin, create a folder within the Pos.Extensions Project for the customizations. Let’s name this folder “Customization Training.”
We’ll create a trigger for our initial customization that displays a window with a customized message.
To implement a trigger, we’ll create a subfolder named “TriggerHandlers” within the Pos.Extensions Project. We’ll create a Typescript file inside this folder to define the trigger functionality. For this example, we’ll focus on creating a PostEndTransactionTrigger.

The PostEndTransaction trigger in retail systems is an event that fires after a sales transaction is completed. This trigger allows for custom logic or actions to be executed immediately following the completion of a transaction.

Here are the steps for this:

Create the folder

  1. Navigate to the Pos.Extensions Project in your code editor.
  2. Right-click on the project or the desired location and choose “New Folder.”
  3. Name the folder “TriggerHandlers”.

Create the typescript file

  1. Inside the “TriggerHandlers” folder, right-click and choose “New File.”
  2. A pop-up will open. Search for a typescript and select a typescript file.
  3. Name the file “PostEndTransactionTrigger.ts.”

Implement the trigger

  • Open the “PostEndTransactionTrigger.ts” file in your code editor.
  • Write the Typescript code to define the trigger functionality. For example, to display a window with a customized message, you can use the following code:

Trigger registration

Each extension package needs a manifest.json file in its root directory. This file contains important details about the package and lists its extensions. It must follow a specific format provided in the Sdk NuGet package. If the manifest doesn’t match this format, the POS system won’t be able to load the extensions.

Registration in extensions.json

The next step is to register our extension package folder in extensions.json file. Update extensions.json with the following content.

Registration in tsconfig.json

The next step is registering our extension package folder in the extensions.json file. Update tsconfig.json to comment out the extension package folder from the exclude list like the following:

Rebuild the solution

Build your solution to ensure that all files are compiled and built successfully.

Build via command prompt

After successfully building the solution, it’s necessary to rebuild it, to apply the implemented changes. This allows us to test the trigger we created and observe the output of its execution.

Step 5: Test the functionality

After installing the MPOS package, we can check if our extensions have been loaded.

We can then test our customization code by running the scenario to see the results.

MPOS in Retail: The future is here

MPOS retail solutions are paving the way for a more interactive and efficient shopping experience. By leveraging Microsoft’s MPOS technology, retailers can offer personalized services, reduce wait times, and enhance customer satisfaction. The future of retail is mobile, and those who adapt to these changes will lead the market.
At Confiz, our certified Dynamics 365 consultants can help you optimize and customize your MPOS to meet your business requirements. If you have any questions or need assistance with MPOS customization, contact us at marketing@confiz.com.